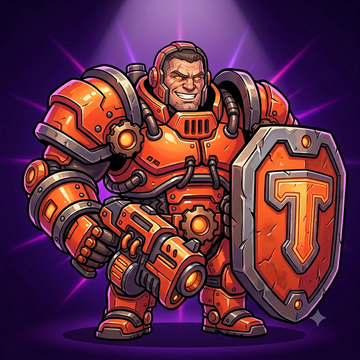
The 50 is the ceiling — all five pellets have to hit the same body. Reach is the ground one pellet covers before it dies, and Tanko's is the shortest of the ten fighters.
165 HP is not the number that decides his matches
Tanko carries the biggest health pool in the game — 165 against a ten-fighter mean of 107.5, a full 35 clear of Rocco behind him, and more than double what Zippy walks around with. It is the stat everyone quotes, and not the one that decides his games.
Health is the currency he spends to buy distance, and distance is the one thing he cannot generate. His pellets die out sooner than anyone's — barely half as far as Rocco's travel, under a third of Nia's — and 185 speed makes him the slowest fighter on the roster. The pool refills slowly too: 14 HP a second, and only after four untouched seconds, so filling him from near-death costs twelve quiet seconds.
The shotgun is a three-pellet gun in practice
Five pellets at 10 damage, 0.6 seconds between pulls, 50 on paper. The fan opens fast, and what you collect steps down with distance. Standing inside your target, all five arrive. One fighter-width back — one character's width on screen — it is four, for 40. Under two widths, three. At three widths, two. At the limit of his range only the middle pellet lands, for a useless 10.
That spread is coverage, not single-target burst: the outer pellets are there to catch the second enemy beside the first — what a doorway or a Horde wave hands you.
Energy cubes are worth more to Tanko than to anyone
Each cube adds 2 damage to every projectile. With five pellets that is +10 per trigger pull, the biggest per-cube gain on the roster — Frost's four take +8, Nia and Rocco +2 — and ten Super pellets turn one cube into +20. Health orbs favour him too: 35% of maximum is 58 HP against Bolt's 35.
Lead Wall deletes people, if you are close enough
🛡️ Super
Lead Wall
Ten heavy pellets at 20 damage each in a tight forward arc, plus an instant 40 HP. Unlike his shotgun it goes exactly where you point it, and it flies noticeably further.
At contact range nine or ten of those pellets land on one body: 180 to 200 damage from a single press, more than the full health bar of every fighter in the game, Tanko's own included. At mid range it is three or four pellets for 60 to 80, and it reaches a third further than his shotgun, so it also answers anyone chipping him from outside it.
Two things to plan around. The 40 HP is capped at your maximum, so pressing it above 125 health throws half the Super away. And the bar charges only from damage you deal — about 222 points, plus 15% per knockout — so a Tanko held at arm's length never gets one at all.
Getting into range without dying on the way
Enemies cannot see you inside a bush until they are about three fighter-widths away: inside your reach, right at the breakpoint where three pellets land. Otherwise use walls, since a corridor denies a faster fighter the room to kite you. And never brawl on hazards — the fence burns 25 HP a second, toxic pools 20, spike traps 80.
Matchups worth memorising
Nia shoots three times as far but needs five clean hits to drop 165 HP — three-odd seconds of unbroken aim, in which you cover three-quarters of her range. Winnable, never in the open.
Rocco is your best fight against a top-tier pick: at 195 speed he cannot kite you, and one contact Lead Wall beats his 130 HP.
Zippy at 300 speed is never caught. Stand on the objective and punish her when she comes to you — two connecting volleys are her whole 80 HP.
Brasa is the trap: the other close-range fighter, except her shots travel further than yours and she moves 65 faster.
Modes built for him, and one that is not
King of the Hill is his mode. The ring reaches about three fighter-widths from its centre, so anyone contesting is already in your range and you never have to chase. Six uncontested seconds wins it, and Tanko is the likeliest fighter to still be standing after six. Gem Rush is the same argument with no storm to outrun.
In 3v3 walk in first: deaths respawn, so your health buys your sniper position. Deathmatch suits him because the targets come to him. Horde is a coin flip, since Lead Wall covers a forward arc only. Royale is his worst — huge map, one life, slowest legs.
What the numbers say he is good at
165 HP — a shade over half again the roster mean of 107.5, and 35 clear of the next toughest fighter
A contact Lead Wall lands around 200 damage — more than any fighter's full bar — and heals 40
The widest spread in the game hits two enemies at once, and every cube adds +10 a volley
Where Tanko loses
Shortest reach of the ten fighters, barely half of Rocco's and under a third of Nia's
185 speed is the slowest on the roster, so any fight you start is a fight you finish
0.6s between shots and twelve seconds to regenerate 165 HP — mistakes cost a long time
The mistake almost every Tanko makes
💡 Firing while you close. Every pull at range is 10 damage and 0.6 seconds of nothing, and it tells the enemy where you are while they walk backwards. Hold fire, spend the health, arrive — then pull where all five pellets land.
Unlocking Tanko and his four looks
He is the first fighter the Reward Road hands you, at player level 2, so most players own him free within a few matches; the shop sells him for 150 coins otherwise. Four looks in all: the classic plus coin skins at 60, 120 and 150.