💊
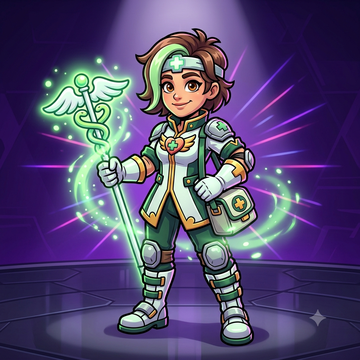
Medika
Support · Self-sustain
115HP
220Speed
11Dmg/shot
2Shots
22Volley dmg
0.42sFire rate
MediumReach
300Unlock
Support · Self-sustain
Medika wins fights she had no business winning, and most of that work happens between them. Everyone in the arena heals after four quiet seconds, at 14 HP a second. Medika starts after two and a half, at 26. On a 115 HP bar that is being whole again seven seconds after breaking contact instead of eleven — and eleven seconds is two rotations in a closing arena.
She pays for it in punch. Two pellets at 11 damage every 0.42 seconds is about 52 damage a second, eighth of ten. Medika never wins a damage race — she wins the third fight of the match, because she is the only one who walked into it undamaged.
115 HP is third on the roster behind Tanko's 165 and Rocco's 130, against a ten-fighter average of 107.5. Her 220 speed ranks sixth: enough to leave a fight, not to chase one. Mid-pack reach is why Nia and Rocco decide most of her losses.
Volley damage is 11 × 2 pellets, and it assumes both land — at range one often does not.
Those three shielded seconds are the undervalued half: 115 HP behind a 60% reduction absorbs around 290 damage, more than Tanko's whole bar. The wave is a mid-fight weapon, not an escape button — cast behind a wall it gives you what five quiet seconds would have anyway.
The bar fills from damage dealt, roughly 45% of it, plus a lump per knockout: about eleven clean volleys. And because Healing Wave deals nothing, casting it refunds none of the next one. Fire it under a third health with a target still in front of you, then keep shooting through the shield.
Her best mode, and the one people misplay. Nobody comes back in 3v3, so the side still holding bodies when the storm tightens wins — and undoing a lost trade is worth more than winning one. Lead the push, eat the opening volley, peel out at a third health, and five and a half seconds later you are full while it is still three-on-three. She heals nobody but herself, so play her as the frontline the enemy overcommits into, not a pocket medic.
Twenty knockouts, a wave every five, up to six enemies at once, and one death ends the run. Break line of sight for five or six seconds and you re-enter at full from a third of your bar — nobody else rebuilds that fast. Knockouts feed the super too, so bank a bar for when two boosted enemies corner you.
One-life modes where a toxic ring herds everyone inward and rewards whoever arrives undamaged. Chip a wounded player, disengage, be full before the ring moves. Do not walk the storm off: toxic ticks reset the regen timer, so the healing never starts. Her edge is the cheapest late rotation in the game — everyone pays the same HP to cross open ground; only she gets it back.
Both plant you somewhere you cannot leave, which is exactly the problem her super solves. Save the wave for the last seconds of a gem countdown or a contested ring, not the skirmish before it.
Her weakest mode. Ninety seconds, respawns two seconds after you drop, a board that counts only knockouts — sustain is cheap to replace and eighth-place damage is the stat that decides it. Bring Sombra or Rocco.
Rocco is the clean counter: three connected 37-damage shots erase her bar almost exactly, from further than she can answer. Nia is the same problem with more distance attached, Brasa the close-range version. Going the other way, Medika beats anything that chips — Zippy's 80 HP loses the long game, and Tanko has the shortest reach in the game, so stay outside it and let the clock work.
Casting at full health. A full heal on a full bar throws away eleven volleys of charge. If nobody is shooting, walk away instead.
Casting too late. Against Brasa or Rocco the wave has to be out before the last exchange, not after the knockout.
Fighting over the heal pickup. It restores 35% of max HP, about 40 points on her — a second and a half of what she does for free. Take the shield or damage boost instead.
300 coins in the shop, or free at level 16 on the Reward Road; boxes can also drop her early. Three paid skins sit alongside her default, from 70 to 150 coins. Learn her rhythm in Training, where the dummies do not shoot back and you can watch the bar refill.
More fighters: 💥 Rocco · 🌑 Sombra · full roster · tier list